✅ Charging Problem
• Not Charging • Not Holding Charge (Not Charging Fully) • Overcharge (Overvoltage)
✅ Completely Dead Not Working
• Causes of Completely Dead • Safety Actions • Prevention Tips
✅ Not Lasting Long
• Causes of Not Lasting Long • Solutions
✅ Over-Discharge (Low Voltage)
• Causes of Over-Discharging • Safety Actions • Prevention Tips
✅ Short Circuit (Overcurrent)
• Causes of Short Circuit • Safety Considerations of Short Circuit
✅ Leaking
• Signs of leakage • Causes of Leakage✅ Self-Heating • Causes of Self-Heating • Safety Actions
✅ Capacity Measurement
• Principle of Capacity Measurement • Capacity Measurement Methods • How to Test 18650 Battery Capacity With Multimeter
✅ Balancing
• Balancing Principle • Balancing Methods
✅ Testing
• Single 18650 Cell Testing • 18650 Battery Pack Testing
✅ Repair Recommendations
✅ Conclusion
✅ FAQ How to revive dead 18650 battery? How to fix 18650 battery? How to measure 18650 battery capacity? How to balance 18650 batteries? How to test 18650 battery?18650 lithium batteries are widely used in devices such as laptops, power tools, e-bikes, and portable electronics. These cylindrical lithium-ion cells provide high energy density and long service life, which is why they are so common in modern battery packs. If you are not familiar with how these cells work, this detailed guide explaining
18650 lithium battery basics can help you understand their structure, voltage range, and typical applications.
Like any lithium battery, however, 18650 cells can develop problems during long-term use. Issues such as charging failures, overheating, corrosion, capacity loss, and voltage imbalance inside an 18650 battery pack are relatively common. Understanding these symptoms, their causes, and the proper ways to test or repair the battery can help improve performance and reduce potential safety risks.
Charging Problem
One of the most common 18650 battery problems is charging failure. The battery may not charge at all, or the charger may stop charging after a short time. This issue is usually caused by a deeply discharged cell, poor contact, a faulty charger, or a damaged protection circuit.
• Not Charging
An 18650 battery that does not charge means the battery fails to accept power from the charger or the charging process does not start. In some cases, the device may indicate no charging at all, while in others the charger may connect but the battery voltage does not increase. This problem can be caused by charger issues, battery cell failure, or faults in the protection board.
Causes of Not Charging
- Charger mismatch or charger failure: Using an incompatible or faulty charger may prevent the battery from charging.
- Protection board (BMS) failure: The protection circuit may block the charging path due to malfunction or internal damage.
- Battery cell damage: Deep discharge, aging, or internal failure can prevent the cell from accepting charge.
Troubleshooting
- Check the charger: Try charging the battery with another compatible charger. If the battery still does not charge, the problem is likely not caused by the charger.
- Measure the cell voltage: If the cell voltages are consistent and within the normal range (about 2.75V–4.2V), the issue is usually caused by a faulty protection board. If the voltage is extremely low or close to 0V, the battery cell is likely damaged. This may be due to poor cell quality or possibly a protection board issue that allowed deep discharge.
- Inspect for physical damage: Check the battery for visible problems such as physical damage, corrosion, or electrolyte leakage. These issues are usually easy to identify from the battery’s appearance and should rule out safe reuse.
• Not Holding Charge (Not Charging Fully)
An 18650 battery that does not hold a charge (not charging fully) usually means the battery charges normally but loses power quickly after charging, or the voltage drops rapidly during use. This problem is commonly related to cell aging, increased internal resistance, or imbalance in a battery pack.
Causes of Not Holding Charge
- Charger failure (less common): In some cases, a faulty charger may prevent the battery from charging properly, although this situation is relatively rare.
- Cell aging or increased internal resistance: For a single 18650 cell, this issue is usually caused by battery aging, where the internal resistance increases and the battery can no longer store energy effectively.
- Cell imbalance in a battery pack: In an 18650 battery pack, different series cells may have inconsistent voltages, causing the pack to lose capacity quickly. This can be caused by cell quality issues or a faulty protection board.
Troubleshooting
- Test with another compatible charger: If the battery still cannot hold a charge after using a different charger, the charger can usually be ruled out as the cause.
- Measure cell internal resistance: If the internal resistance of the cell has increased significantly, the problem is most likely caused by cell aging or damage.
- Check voltage consistency between cells: If the internal resistance of the cells is similar but the voltages are inconsistent, the issue may be related to either the protection board or the battery cells themselves.
• Overcharge (Overvoltage)
Overcharge or overvoltage occurs when an 18650 lithium-ion battery is charged beyond its safe maximum voltage, typically above 4.2 volts. Charging above this limit stresses the internal chemistry of the battery and can lead to overheating, swelling, electrolyte leakage, or permanent capacity loss. In severe cases, excessive voltage may trigger thermal runaway and create a fire risk.
Most modern 18650 cells rely on chargers or protection circuits to prevent this condition. However, faulty chargers, damaged protection circuits, or improper charging setups can still allow overcharging.
Causes of Overcharge
- Using an incompatible or defective charger
- A failed protection circuit (BMS or PCB)
- Charging cells without proper voltage regulation
- Incorrect charger settings in DIY battery packs
- Attempting to charge damaged or degraded batteries
These situations allow voltage to exceed safe limits and accelerate battery degradation.
Steps to Handle an Overcharged 18650 Battery
- Stop charging immediately and remove the battery from the charger.
- Measure the battery voltage with a multimeter to check if it exceeds 4.2V.
- Inspect the battery for signs of damage such as swelling, heat, or leakage.
- Replace faulty chargers or protection circuits before using new batteries.
Batteries that have been significantly overcharged should not be reused, as internal damage may already have occurred. For safety, the battery should be disposed of through a certified battery recycling facility.
Completely Dead Not WorkingA completely dead 18650 battery refers to a cell that shows no response during use or charging. The device may not power on, and the battery may not accept charge from a compatible charger. In many cases, the voltage of the battery has dropped far below its safe operating range, or the internal protection circuit has shut the battery down to prevent damage. A fully non-functional cell usually indicates serious internal degradation or electrical failure.
• Causes of Completely Dead
Several factors can cause an 18650 battery to stop working entirely:
- Severe over-discharge causing the voltage to fall below the safe limit
- Internal cell damage or short circuit
- Battery aging after many charge cycles
- Protection circuit lockout in protected batteries
- Poor electrical contact or damaged terminals
- Long-term storage without charging
These conditions may prevent the battery from delivering power or accepting a charge.
• Safety Actions
- Measure the battery voltage with a multimeter to confirm whether it is deeply discharged.
- Check the battery contacts and device terminals for dirt or corrosion.
- Try charging the battery with a proper lithium-ion charger.
If the voltage is extremely low or the battery does not respond to charging, the cell is likely permanently damaged and should not be used again. For safety, it should be disposed of through an approved battery recycling program.
• Prevention Tips
To prevent an 18650 battery from becoming completely dead, avoid deep discharging the battery and recharge it before the voltage falls too low. Batteries stored for long periods should be kept at a moderate charge level and checked periodically. Using quality chargers and avoiding extreme temperatures can also help extend battery life and reduce the risk of total failure.
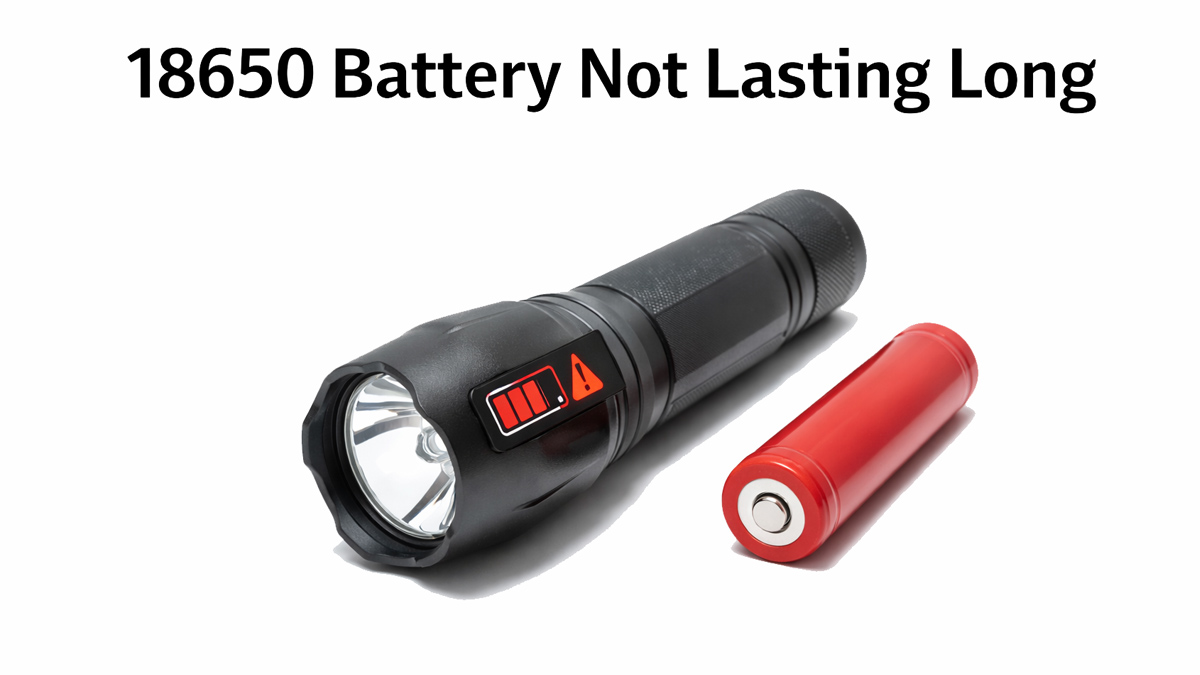
Not Lasting LongAn 18650 battery that does not last long (drain too fast) means the battery runs out of power quickly even after a full charge, which usually indicates reduced capacity or imbalance inside the battery pack.
• Causes of Not Lasting Long
- Battery aging: After many charge cycles, lithium-ion cells naturally lose capacity and the runtime becomes shorter.
- Poor cell quality or inconsistency: Cells inside the battery pack may have different capacities, causing the pack to stop working earlier when the weakest cell reaches the cutoff voltage.
- Protection board self-consumption: The protection circuit may slowly drain certain cells, creating voltage imbalance in the pack.
• Solutions
- Balance the battery pack: Voltage balancing can temporarily restore performance if the issue is caused by cell imbalance.
- Replace the protection board: If the imbalance is caused by BMS self-consumption, the protection board should be replaced.
- aging cells: If the battery pack is old and degraded, replace the entire pack (all cells as a matched set) rather than swapping only one or two cells.
If an 18650 battery pack is not lasting long, the most common causes are normal cell aging, cell inconsistency, or BMS self-consumption. Balancing may help when the pack is imbalanced, but if the cells are truly degraded, the only reliable solution is to replace the entire battery pack.
 Over-Discharge (Low Voltage)
Over-discharge occurs when an 18650 lithium-ion battery is discharged below its safe minimum voltage, typically around 2.5–3.0 volts. When the voltage falls too low, the internal chemistry of the battery becomes unstable and permanent damage can occur. A severely discharged battery may appear completely dead, fail to accept charge, or show greatly reduced capacity after recharging.
Low voltage is often a sign that the battery has already been deeply discharged or left unused for a long period without recharging.
• Causes of Over-Discharging
- Leaving the battery in a device that continues to draw power
- Long-term storage without periodic charging
- Using devices without low-voltage protection
- Battery aging or increased internal resistance
- Faulty electronics that continue draining the battery
These situations can slowly drain the battery below its safe operating limit.
• Safety Actions
- Measure the voltage using a multimeter to confirm the level.
- If the voltage is only slightly low, a proper lithium-ion charger may be able to recharge it slowly.
- If the voltage is extremely low (for example below about 2V), the battery may be permanently damaged.
Deeply discharged batteries can become unstable after recharging, so they should be used with caution or replaced entirely if performance is poor.
• Prevention of Over-Discharging
Avoid allowing 18650 batteries to drain completely during normal use. Devices should ideally stop operating before the voltage drops too low. For long-term storage, keep batteries partially charged and check them periodically. Using devices or battery packs with proper low-voltage protection circuits can also help prevent deep discharge and extend battery life.
Short Circuit (Overcurrent)A short circuit occurs when current flows through an unintended low-resistance path, causing excessive current (overcurrent). This can generate heat quickly and may damage the battery cell or protection circuit.
• Causes of
Short Circuit
- Broken wiring or contact short circuits: Damaged wires or loose connections inside a battery pack can create unintended paths that lead to overcurrent.
- Internal cell short circuit: Internal damage may cause the cell to heat continuously while discharging until the voltage drops close to 0V.
- Protection board failure: A faulty BMS may fail to limit current, allowing dangerous overcurrent.
- Moisture or corrosion: Water intrusion or corrosion between terminals can create conductive paths.
- Physical damage: Deformation, puncture, or crushing can damage internal layers and cause a short circuit.
• Safety Considerations of
Short Circuit
- Without a protection board: A short circuit can produce severe overcurrent and rapid heating, creating a high fire risk. Even if the cell still appears usable, it should not be used again.
- With a protection board: External short circuits are usually stopped by the BMS. If the battery works normally after protection resets, it may still be usable.
- Internal short circuit: If the battery continues heating, move it away from people and place it outdoors or in an explosion-proof container for observation.
- Fire risk: If smoke or fire occurs, extinguish immediately. If ignition is suspected, the battery can be placed in water or covered with sand to isolate the reaction. Afterward, send the battery to a battery recycling facility.
18650 battery short circuits can cause dangerous overcurrent and overheating. External shorts may be stopped by a protection board, but internal short circuits are always a serious safety risk. If a battery shows abnormal heat or damage, move it to a safe place and send it to a battery recycling facility instead of continuing to use it.
Leaking18650 battery leakage refers to the release of internal electrolyte from the cell. In most cases, leakage appears near the positive terminal (top cap area), where internal pressure is highest. Liquid coming from the negative end or along the steel casing is less common and usually indicates physical damage, such as puncture, crushing, or severe deformation.
• Signs of leakage
- Oily or sticky liquid near the positive terminal
- Corrosion or discoloration around the top cap
- Unusual odor
- Reduced battery performance
- Swelling or pressure marks
Leakage is a serious safety issue and should never be ignored.
• Common Causes of Leakage
- Internal manufacturing defects
- Overcharging or charging with an incompatible charger
- Overheating or exposure to high temperatures
- Physical damage (puncture, crushing, dropping)
- Aging or internal seal failure
In many cases, leakage indicates that the battery has already suffered internal structural damage.
Leakage is generally not something you should try to repair. In most cases, it points to an underlying cell-quality issue or internal failure, and simply replacing the leaking cell may only provide a short-term fix—other cells or components in the pack can still be compromised, and the overall safety risk remains high. Even when leakage is caused by external impact or improper use, the safest approach is the same: stop using the battery, remove it from the device, and dispose of it through a proper battery recycling or hazardous waste program rather than attempting to repair or reuse it.
Self-HeatingWhen an 18650 battery cell becomes abnormally hot, it usually indicates a problem with the cell itself. Overheating can occur for several reasons, and identifying the cause is important for safety.
• Causes of 18650 Cell Heating
- Poor Cell Quality or Internal Defects
Low-quality or defective cells may develop internal short circuits due to manufacturing issues. This is one of the most common reasons for continuous heating.
- Improper Use
Using the battery beyond its rated limits—such as high current discharge, overcharging, or using incompatible chargers—can cause excessive heat buildup.
- Physical Damage
Dropping, crushing, or bending the battery can damage the internal structure, which may lead to internal short circuits and heating.
- Moisture or Water Exposure
If water or humidity enters the battery pack, it can cause corrosion or electrical leakage, increasing the risk of overheating.
• Safety Actions
If an 18650 battery begins to heat up:
- Immediately move the battery outdoors to an open area away from people and flammable materials.
- Prepare fire-extinguishing materials such as sand, water, or a fire extinguisher.
- Stop using the battery immediately.
- If no fire occurs, send the battery to a lithium battery recycling center as soon as possible.
Never attempt to reuse, repair, or dispose of a heating lithium battery improperly, as overheating may lead to thermal runaway, fire, or explosion. Proper disposal is the safest solution.
Capacity MeasurementTesting the capacity of an 18650 battery helps determine how much energy the cell can actually store and deliver. Battery capacity is typically measured in mAh (milliampere-hours) and reflects the usable energy available during discharge. Over time and after many charge cycles, the actual capacity of a battery gradually decreases. Measuring capacity is one of the most reliable ways to evaluate battery condition and overall health.
• Principle of Capacity Measurement
Capacity testing requires dedicated capacity-testing equipment, and it is not an instant measurement. Unlike voltage or internal resistance—which can be checked in seconds—capacity must be measured through a controlled charge or discharge cycle. For a typical ternary lithium-ion (NMC) 18650 cell, capacity is determined by running the battery through a defined voltage range:
- Discharge test: from about 4.2V down to 2.75V
- Charge test: from about 2.75V up to 4.2V
During the test, the device applies a fixed current (constant charge or discharge current) and records the time it takes to complete the cycle within that voltage window. The capacity is then calculated using the core principle:
- Capacity = Current × Time
Because this calculation depends on controlled current and test duration, a normal multimeter cannot directly measure capacity—only a charger/tester or professional analyzer that can run a full cycle and log the data can provide a reliable capacity result.
• Capacity Measurement Methods
- Single 18650 Cell Capacity Testing
A practical and inexpensive way to measure capacity is by using a multi-function cylindrical battery charger. These chargers support multiple cylindrical lithium-ion battery sizes and often include a capacity testing mode. During a full charge–discharge cycle, the device records how much energy the battery delivers, which provides an estimate of its real capacity. These compact chargers are widely available and typically cost around $8–$30, making them suitable for hobbyists and basic battery testing.
- 18650 Battery Packs Capacity Testing
18650 battery packs capacity testing usually requires a dedicated battery capacity tester or battery analyzer. These devices are designed to handle higher voltages and currents from battery packs and can perform controlled charge–discharge cycles to measure total capacity accurately. Professional battery testers are more advanced and generally cost around $100–$300, but they provide more precise measurements and better safety control when testing larger battery assemblies.
• How to Test 18650 Battery Capacity With Multimeter
A standard multimeter cannot directly measure the capacity (mAh) of an 18650 battery because capacity is not an instant value like voltage or resistance. Capacity must be determined by discharging or charging the cell over time at a controlled current and calculating the total charge moved (current × time). A multimeter can check voltage and, in some cases, current at a single moment, but it cannot run a controlled load test and automatically track time and cutoff voltage, so it cannot provide a true capacity reading on its own.
Balancing18650 battery pack balancing is used to restore voltage consistency between cells in a lithium battery pack. Lithium batteries require each series cell to maintain a similar voltage to work properly. During manufacturing, cells are usually matched within about 10 mV voltage difference and around 5 mΩ internal resistance.
However, during long-term use, factors such as aging, self-discharge, or protection board consumption can cause the voltage difference between cells to increase, reducing usable capacity and causing the battery pack to stop working earlier. Balancing can restore voltage consistency and recover much of the battery pack’s performance.
• Balancing Principle
The basic principle of balancing is to bring the voltage of each cell in the battery pack back to the same level. A battery balancer transfers or adjusts energy between cells so that higher-voltage cells are reduced and lower-voltage cells are raised until the voltage difference becomes minimal. Once the cell voltages are aligned again, the battery pack can operate more efficiently and utilize its full capacity.
• Balancing Methods
Battery balancing is typically performed using a dedicated battery balancing device. The process usually involves opening the battery pack, disconnecting the protection board balance connector, and connecting the cells to the balancing equipment so the device can adjust each cell’s voltage until they become consistent.
TestingWhen troubleshooting a problematic 18650 battery, many common issues can actually be diagnosed with a simple multimeter. By measuring the battery’s voltage and basic electrical behavior, you can quickly determine whether the problem is related to over-discharge, charging failure, internal damage, or a faulty protection circuit. In most cases, this basic test is enough to identify the main issue before deciding whether the battery can still be used, needs professional repair, or should be safely recycled.
• Single 18650 Cell Testing
- If the cell voltage is within the normal range (2.75V–4.2V) but the battery still cannot work properly, the problem is most likely caused by the protection board (BMS).
- If the cell voltage is below 2.75 V, or even close to 0 V, the issue may be caused by either the cell itself or the protection board. In most cases, the battery should simply be replaced with a new one, as further diagnosis is usually not cost-effective.
• 18650 Battery Pack Testing
For an 18650 battery pack, the normal voltage range of each cell is also 2.75V–4.2V. If the battery pack cannot work properly, you should first check the voltage of each cell group.
- All Cell Voltages Are Normal and Consistent
If the cell voltage is within the normal range and the voltage of each series group is consistent, the battery cells are likely functioning properly. In this situation, the most probable cause is a damaged BMS (battery protection board).
- One or More Cells Are Below 2.75 V
If one or more cell groups show a voltage below 2.75 V, or even close to 0 V, it is difficult to quickly determine whether the issue is caused by the cells or the BMS. In most cases, the repair cost becomes relatively high, because the faulty cells must be identified and replaced. Unless the battery pack is expensive, repairing it is generally not recommended.
- Voltage Is Normal but Cells Are Not Balanced
If all cells are within the normal voltage range but the voltage between series groups is inconsistent, the battery pack should first be balanced. Balance the cells until the voltage difference is within about 10 mV. After balancing, disconnect the BMS balance cable and observe the battery pack for 3–5 days. Then test the voltage again: If the voltage difference increases significantly, the problem is likely caused by cell quality issues. The battery may still work temporarily, but the imbalance will likely return soon. If the voltage difference remains stable, the issue is likely caused by the BMS protection board, and replacing the BMS should resolve the problem.
Fixing RecommendationsIn most cases, battery issues are related to either the cell or the protection board (BMS/PCB). Repair usually involves replacing the damaged cell or protection board to recover normal battery function. However, this kind of work must be done by a professional repair center. Attempting to repair or replace these parts without proper tools and experience can easily cause short circuits, further damage, or even fire hazards.
In general, batteries that show deformation, electrolyte leakage, or severe corrosion should not be repaired. The battery should be removed from the device and sent to a lithium battery recycling facility for proper disposal. If the cell voltage is extremely low (below 2.75 V) or even close to 0 V, or if the BMS protection board is damaged, users should not attempt to replace the cells or the protection board themselves.
Improper repair without professional knowledge can easily lead to short circuits, and in severe cases may cause fire hazards. For safety reasons, such batteries should be taken to a professional battery repair service or qualified technician for inspection and repair.
Conclusion18650 lithium batteries are different from ordinary electronic products. When problems occur, they may create serious safety risks if they are ignored or handled improperly. For this reason, it is important to purchase 18650 batteries from reliable brands, trusted suppliers, or reputable manufacturers to ensure quality and safety.
If a problem appears in an 18650 battery or an 18650 battery pack, it should not be ignored, and users should avoid attempting to disassemble or repair the battery on their own. Because lithium batteries contain high energy and sensitive internal structures, improper handling can lead to short circuits, overheating, or fire hazards. Instead, faulty batteries should be taken to a professional repair service or battery technician for proper inspection and repair.
FAQHow to revive a dead 18650 battery?First measure 18650 battery voltage with a multimeter. If the voltage is slightly low, a compatible lithium-ion charger may recover it slowly. If the voltage is extremely low or near 0V, the cell is usually permanently damaged and should not be reused.
How to fix an 18650 battery?Troubleshooting usually involves checking the charger, measuring 18650 battery voltage, and inspecting the protection board. In many cases, the issue is caused by aging cells or a faulty BMS, and replacing the battery or the protection board may be required.
How to measure 18650 battery capacity?18650 battery capacity cannot be measured instantly. A capacity tester or charger with a testing function discharges the battery at a controlled current and calculates capacity based on current and time.
How to balance 18650 batteries?Battery balancing equalizes the voltage of each cell in a battery pack. A dedicated balancing device is typically used to restore voltage consistency between 18650 cells.
How to test an 18650 battery?Testing 18650 capacity usually includes measuring voltage, internal resistance, and capacity using tools such as a multimeter, battery charger with testing functions, or a professional battery tester.


